To create an object visualized with a symbol from the symbol file, choose one of the symbol tables in the lower part of the Objects menu.
The Object Browser appears allowing you to create the object types applicable to this symbol table. Select the object type and give the object a name and click Create.
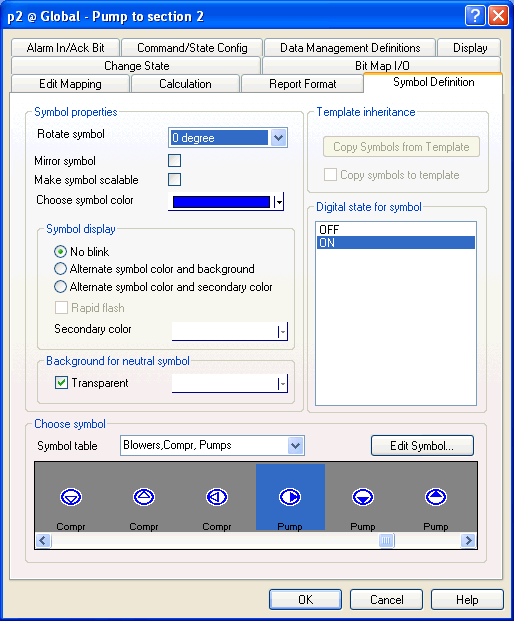
The object properties dialog box appears. Click the Symbol Definition tab.

At the bottom under Choose symbol, the symbol table selected in the Objects menu appears. Find the symbol in the browse pane and select it. Then choose the symbol color and adjust the other parameters, as required.
You can re-size the symbol if you select the scalable check box.
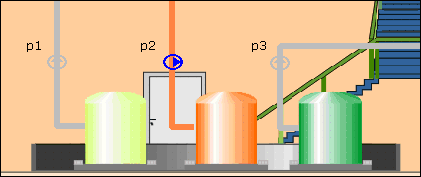
Finally, when you’ve clicked OK in the object properties dialog box, the symbol, object name and value/state can be placed freely on the diagram. In the figure below the object name (p2) and the symbol has been placed over the pipe.

To edit a symbol, select it in the browse pane and click the Edit
Symbol button. The
To create a new symbol, select the relevant symbol table and click the Edit Symbol button. The Symbol Editor is activated. Browse to the first unused symbol in the table – called “NoName” – and draw the symbol.
You can also use the Area Property Table View and Diagram Property Table View forms to mass-assign a symbol to many objects.
The symbol number is found in the Icon column in the Descriptors > Icons > Connected folder in the left pane of the Property Table View form.
The symbol number can be seen in the Symbol Properties tab of the Properties form in the Symbol Editor form in the gray field to the left of the Symbol name field. The symbol number is prefixed with "S="
See Also