Change the faceplate master diagram using the Properties Table View (PTV)
It is relatively easy to change the Faceplate Master Diagram on which a faceplate is based. This can be relevant when one faceplate master is used to create many identical faceplate diagrams, e.g. pump stations, and you need to reallocate some of these to a faceplate master for a different type of pump station.
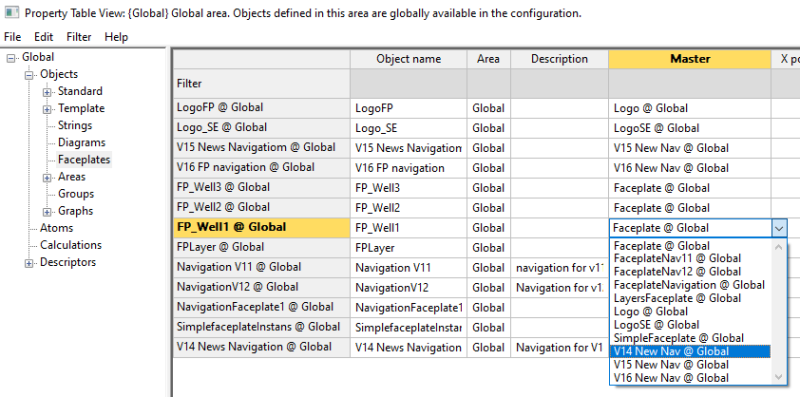
A new Faceplates branch in the Objects group in the left pane of the area PTV (Shift + Ctrl + H) gives access to edit the faceplate diagram properties, and to change the associated faceplate master diagram in the Master column.
-
Open the area that has the relevant faceplate diagram(s).
-
Press Shift + Ctrl + H to open the area PTV.
-
In the left side panel of the PTV form, unfold the Objects branch and select Faceplates. The right-side panel’s Master column shows the faceplate master diagram for each faceplate diagram in the area.
-
Double-click inside the master cell for the relevant faceplate diagram and select the name of another faceplate master diagram, you want the faceplate diagram to be associated with.
-
Click the X in the top right corner of the Property Table View to save the change and exit the view.
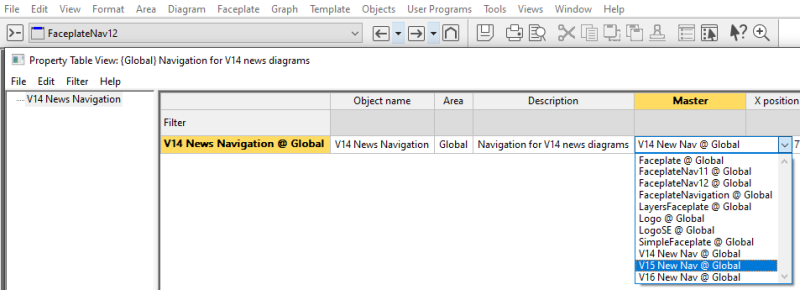
Another way to change a faceplate master diagram associated with a faceplate is through the new faceplate instance PTV. In the open faceplate instance in the Definition module:
-
Right click in a faceplate instance.
-
Select Property Table View (Ctrl + H).
-
While in the top branch in the PTV, go to the Master column.
-
Double-click inside the Master cell and select another faceplate master diagram, you want the faceplate diagram to be associated with.
-
Click the X in the top right corner of the PTV to save the change and exit the view.


